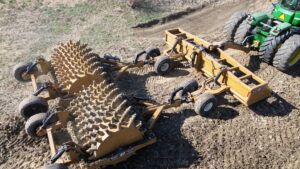
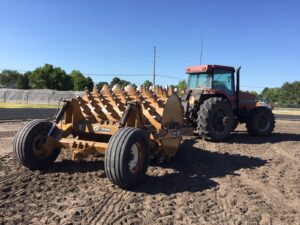
A box scraper is one of the most versatile land-leveling tools available. Whether you’re maintaining feedlot pens, building haul roads, shaping pads, repairing driveways, or finishing construction sites, proper setup and operation make the difference between rough work and professional results.
What a Box Scraper Does
A box scraper performs three primary functions:
- Cut – Removes high spots and loosens material.
- Carry – Holds material inside the box.
- Fill – Deposits material into low areas.
Think of it as a small earthmoving machine that continuously cuts, transports, and levels soil.
Understanding the Components
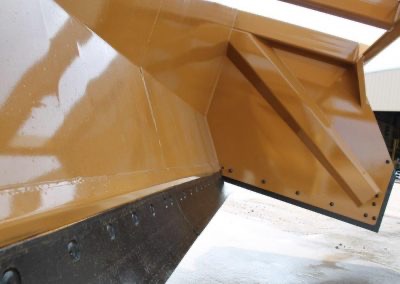
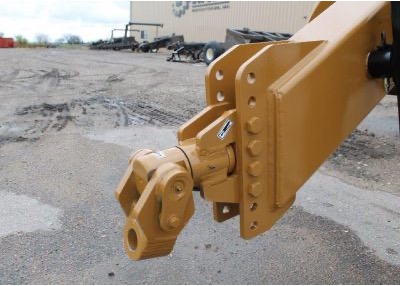
Cutting Edge
The front and rear blades that cut and level material.
Side Plates
Hold material inside the scraper.
Hitch/Tongue
Connects the scraper to the tractor.
Hydraulic Cylinder (if equipped)
Allows adjustment of cutting depth and blade pitch while moving.
Step 1: Set Up the Tractor Correctly
Tractor Size
A common rule:
| Box Width | Recommended HP |
| 6 ft | 40–60 HP |
| 8 ft | 60–90 HP |
| 10 ft | 90–130 HP |
| 12 ft | 120–180 HP |
| 16 ft+ | 180+ HP |
For heavy cutting, traction is often more important than horsepower.
Tire Ballast
For maximum performance:
- Fill tires when possible.
- Use front weights if steering becomes light.
- Maintain proper tire pressure.
Lack of traction is the most common reason operators struggle with scraper performance.
Step 2: Understanding Pitch (Angle)
The pitch of the scraper controls how aggressively it cuts.
Aggressive Cutting Position
Front cutting edge lower than rear.
______
/_____/__
Use for:
- Cutting high spots
- Moving dirt
- Initial grading
- Feedlot cleaning
Advantages:
- Faster material loading
- More aggressive cut
- Better penetration
Disadvantages:
- Rougher finish
- Higher draft load
Neutral Position
Both cutting edges level.
_______
|_______|
Use for:
- General grading
- Everyday maintenance
- Driveway work
Advantages:
- Balanced loading
- Smooth operation
- Good material control
Finishing Position
Rear cutting edge slightly lower.
_______
_/_______|
Use for:
- Final grade
- Seedbed preparation
- Finish leveling
Advantages:
- Smoother finish
- Less gouging
- Better surface consistency
Fixed vs. Float Position
This is one of the most misunderstood concepts in grading.
Fixed Position
The scraper is locked at a set height.
Best For
- Cutting high spots
- Building crown
- Creating slope
- Excavating
Benefits
- Precise grade control
- Consistent cut depth
- Better material movement
Mistakes
Too much down pressure causes:
- Wash boarding
- Tractor bouncing
- Excessive fuel consumption
Float Position
The scraper is allowed to follow the ground naturally.
Best For
- Final smoothing
- Maintaining existing grade
- Gravel driveways
- Finish work
Benefits
- Smooth surface
- Less operator fatigue
- Reduces gouging
Mistakes
Using float too early can cause:
- Poor cutting
- Failure to remove high spots
- Excessive passes
Proper Grading Procedure
Step 1: Identify High and Low Areas
Many operators immediately start scraping without evaluating the site.
Instead:
- Locate drainage paths.
- Mark low spots.
- Identify material source areas.
Remember:
Move dirt from highs to lows.
Step 2: Make Aggressive Initial Passes
Use:
- Fixed position
- Forward pitch
- Moderate speed
Goal:
Load the scraper quickly.
Step 3: Carry Material
As the scraper fills:
- Reduce aggressiveness.
- Keep tractor speed consistent.
- Avoid sudden turns.
An overloaded scraper causes rough grading.
Step 4: Fill Low Areas
Approaching low spots:
- Slightly reduce pitch.
- Allow material to flow out gradually.
Do not dump all material in one pile.
Step 5: Finish Passes
Switch to:
- Float mode
- Rear-blade finishing pitch
Make long continuous passes.
Building a Crowned Road
A proper crown sheds water.
Typical road crown:
- ½” to ¾” per foot of width
- Approximately 3–5% slope
Example:
20-foot roadway:
Center should be roughly 4–6 inches higher than edges.
Procedure
- Pull material toward center.
- Build crown gradually.
- Finish with float.
- Avoid creating ridges.
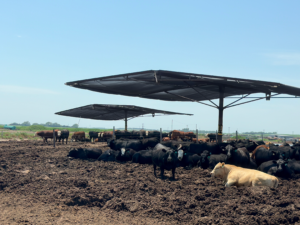
Feedlot Pen Maintenance
For feedlots:
Wet Conditions
- Remove only high ridges.
- Avoid digging below established grade.
Dry Conditions
- Cut aggressively.
- Maintain drainage slopes.
- Remove manure buildup from fence lines.
The objective is smooth drainage rather than perfectly flat pens.
Construction Site Pad Preparation
Rough Grade
- Aggressive pitch
- Fixed position
- Move large volumes
Intermediate Grade
- Neutral pitch
- Multiple crossing passes
Finish Grade
- Float mode
- Light finishing passes
The final pass often determines whether additional equipment is needed.
Common Operator Mistakes
1. Driving Too Fast
Results:
- Washboards
- Bouncing
- Uneven grade
Recommendation
3–7 mph for most grading work.
2. Trying to Cut Too Deep
Results:
- Wheel slip
- Poor finish
- Excessive fuel use
Take multiple shallow cuts instead.
3. Not Using Scarifiers
Hard ground often needs ripping first.
Benefits:
- Faster grading
- Better penetration
- Reduced tractor load
4. Making Short Passes
Short passes create:
- Dips
- Ridges
- Inconsistent grade
Long passes produce smoother results.
5. Constant Hydraulic Adjustments
Many operators over-correct.
Better approach:
- Set pitch.
- Let the scraper work.
- Make small adjustments only when necessary.
Professional Tips
For Maximum Production
- Cut downhill when possible.
- Work with moisture in the soil.
- Keep cutting edges sharp.
- Use the largest scraper your tractor can efficiently pull.
For Best Finish
- Reduce speed.
- Use float.
- Make overlapping passes.
- Finish in the same direction as drainage.
For Hard Clay
- Rip first.
- Wait for adequate moisture.
- Take shallow cuts.
For Gravel Roads
- Never remove all loose gravel.
- Blend material gradually.
- Maintain crown continuously.
Quick Reference Setup Chart
| Task | Pitch | Mode | Speed |
| Feedlot Cleaning | Aggressive | Fixed | 3–5 mph |
| Land Leveling | Neutral | Fixed | 4–6 mph |
| Road Crowning | Moderate | Fixed | 4–5 mph |
| Building Pads | Aggressive | Fixed | 3–5 mph |
| Final Grading | Rear Slightly Down | Float | 3–4 mph |
| Gravel Maintenance | Neutral | Float | 4–6 mph |
The Most Important Rule
The best box scraper operators spend very little time adjusting hydraulics and a lot of time observing material flow.
Watch the dirt, not the scraper.
If material is moving smoothly from high spots to low spots and leaving a uniform surface behind, the scraper is set correctly. If the tractor is spinning, bouncing, or leaving ridges, adjust pitch and reduce the cut until the machine works with the ground rather than fighting it.